Saturday, October 8, 2011

Fresh Sewing Day

This is really late, but Lynne at Lily's Quilts does a fresh sewing day link up party the first day of every month.  I'm only a week late! But here's what I've accomplished in the month of September.

First, I've done some fall crafting.
My creation

These are the bee blocks for the groups that I'm in.
September Bee Blocks

And I've watched my Quilting for Kids blocks steadily come in.  It's grown from a few to many! I'm so excited to start working on this one this month.
Quilting for Kids

And lastly, I pieced a king size quilt top.  I'm in the process of basting.  Pics will come when it is finished.
1st Commissioned Quilt

Check out what everyone else is doing!
Fresh Sewing Day

How do You Trim Your Tree?


This month in my Fall Bee, I was sent the paper and the fabric to make six of these cute little trees.

They were a breeze to make (hee hee).

Now, I have to trim the trees.  Trim, as in decorate.   She's going to be making a Christmas quilt.

So I want to pick your brains.

I have ideas of how I will trim them, but what would you do?


Sunday, October 2, 2011

I've Been Busy!

Whew! I pieced a king size quilt top in a week.  In the midst of my husband being out of town for two days and two of my children coming down with a little cold.  (I'm patting my back.)

This thing is so heavy, and it's not even basted yet...it's going to be a beast to quilt!  But I'm up to the challenge.

It's my first commissioned quilt, so I'm excited.  Here's a sneak peak.

1st Commissioned Quilt

I've also made some headway on my two birdie stitches quilts that I'm making with Little Miss Shabby.  I'll post those pics later, but the quilt top is almost pieced, just need a border.

And here are two stars that I've made for the October Grace group of do.Good stitches.

Star block for Grace do.Good stitches
Margaret's Choice Quilt block found here.

Star block for Grace do.Good stitches
Eccentric Star Quilt block found here.

She asked for purple and gray stars. And I LOVE this color combo! I see some more in my future. But for now, I must complete what I've started.

And this is another call for help, this time from Lyanna from Purple Panda Quilts.

She works with foster children and wanted to give them a stocking for them to keep for this Christmas. So she's recruiting 50 people to make stockings. She'll be posting stocking tutorials on her blog every Tuesday (I think) and will help you along the way. I've already pledged to make one on her flickr group Stockings for Kids. Will you go over there and help her out like she helped me with my Quilting for kids blocks?  And please tell her I sent you!


{Sew} Modern Monday at Canoe Ridge Creations


Sew Happy Geek


Monday, September 19, 2011

Weekend Wrap Up

Wow, I can't believe Monday is already gone.

This was a super busy weekend. I got a lot accomplished and feel great about it!

Mostly, it was cleaning, though. I cleaned out the clutter from my laundry room and washed it from top to bottom. It's actually not that bad to be in there now.  I also did the same for the two bathrooms. 

I also finished the laundry (however, that was Saturday, and I have probably about 2-3 loads to do now. The never ending story.....lalalalalala)

BUT - I did make a few things.

Halloween

Halloween

A cute little halloween inspired rosette pin.  It's for sale in my etsy shop.

Fall Wreath

Fall Wreath

And a fall wreath.  This was inspired by something somewhere on the internet. I feel badly that I do not have the link for it.  It was so pretty and stuck in my head.  While I was shopping I picked up the wreath on a whim and just had to make it.  So, sorry if it was your idea first.  But thank you!

This will be going to my friend, Bec.  She's been my friend since kindergarten!

I think I'm going to have to make one for me, though, because every time I pass it in my house I just love it.

And last but not least, I made a little wall hanging to put up in my laundry room.

Originally, I was going to make something colorful and quirky with something like "Wash, Wear, Repeat."

As I was going through my stash, though, I found these fabrics.


These are the fabrics that I chose for a little girl quilt when I was pregnant with my first child.

He was a boy.

Second baby was a boy.

Then I had two miscarriages.  One of them, I'm convinced is a little girl.  She was a fighter.  She held on through a lot.  My second son was in the NICU when he was born, and I commented that there were mostly little boys in there.  The nurses said, "That's because little girls are fighters.  They hang on and get out of here quickly."  So, I think she's a little girl waiting for me in heaven.

So I made this little wall hanging that says, "Thank You, Lord, for those I wash for and for those I do not."  It is a little dress and quilt hanging on the line.


It will be nice to see this in the laundry room, when I'm doing the never ending job.  It will remind me to be thankful for those I have to hold.

Including boy number 3.

{Sew} Modern Monday at Canoe Ridge Creations

Making


Sew Happy Geek

Wednesday, September 14, 2011

Lots Going On!

 I have finally finished sewing the binding on to this little baby quilt/play mat.  I added an extra layer of batting to make it the perfect floor mat for those early months.
Here's the back:


This is the quilt that I've made for my little niece Ayla. (really she's my second-cousin, but she's more like a niece to me.)   I gave it to her for her second birthday, and now her mom is going to use it to decorate her "big girl" bedroom.  She asked for a few pillows to go with it.

Ayla's Circles


Here is the front with an A for Ayla.  (You can see the tutorial here.)

All I have left to do is stitch the bottom closed.

And this is the back of the pillow.  It's actually a light pink, but I darkened the picture so you can see that I quilted her name into the pillow a few times amidst the stippling.


I've been wanting to make this sprocket pillow for a long time, using Cluck, Cluck, Sew's tutorial.  She gives great guidance as you make it and it goes together extremely fast, like an hour or so.
Mine is almost done.  I ran out of filling, so I'll have to finish it up another day.


I have also sent in my first two blocks for the do.Good Stitches charity bee.  I have never made a wonky log cabin, but now I can cross that off my list! Here is one of them.
do. Good stitches block for Grace - September

I have a few other WIP's going on.  My Quilting for Kids quilt blocks are still coming in.  You can see the progress  here

I'll also be starting my FIRST commissioned quilt soon. (!) So exciting!

And I'll be making a few memory quilts for a family member who's father just passed away.  I'll share with you all as I go.

Thanks for stopping by!

Linking
WIP Wednesday at Freshly Pieced


Sew Happy Geek


Esther’s Website

Saturday, September 10, 2011

Blocks Received

More of your b-e-a-utiful blocks have come in the mail.

I am so excited every time I go to the mail box now.  My husband can't believe the amount of mail we're receiving.  :)

I opened one and said, "Oh! She used Sherbert Pips!" And he looked at me like I was crazy.

He said, "What are you talking about?"

I explained to him it was a line of fabric.  And then I saw another block with some Sugar Pop.

And now he really thinks I've gone overboard!  LOL


I'm okay with that.

So here's what we've received so far!


Blocks received to date 9/10/11


Blocs received to date 9/10/11

So, what do you think? It's exciting!

Two thoughts:
1. I love these blocks and all of you.
2. I need a design wall.

Have a great weekend!

Wednesday, September 7, 2011

How to make an Outlined Letter

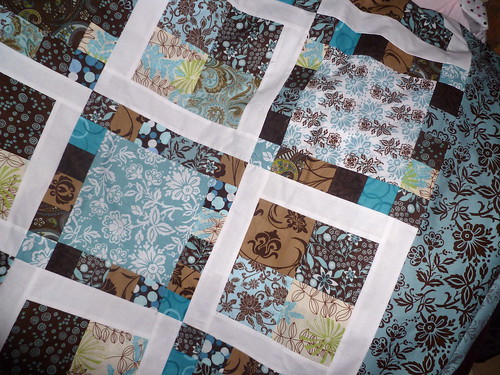
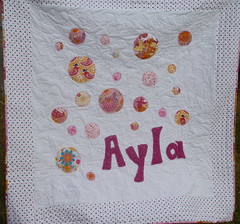
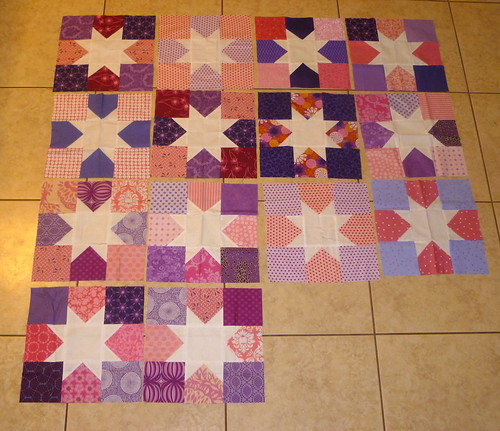
I recently made a quilt for my cousin's daughter.  It was her second birthday gift from our family.

Her mother, Nicole, really like it.  She's getting ready to switch everything over to her "big girl" room, since she now has another bun in the oven.  So she asked if I could make a few decorative pillows.  And she mentioned she would like one with the letter A on it.
Since I didn't want to use the same material that I made her name with, instead I used a lot of the materials from the circles.  

But to start, I printed out a nice, big letter A using PowerPoint.  I went through and chose the font I liked then chose to print the outline only, so as not to waste more ink. Don't forget to then draw a 1/4 inch seam allowance around your letter.


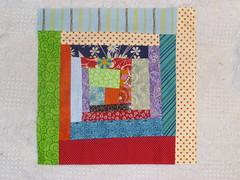
Next I sewed strips onto the backside of the paper using the paper piecing method.  If you have questions, feel free to ask.


I didn't take a picture of it, but after I sewed the fabric on, I turned it over and cut out the letter A, including the 1/4 inch seam allowance.  And this is what's left:

Now I wanted to outline the letter with a small black strip.  And I also did not want any raw edges showing for the letter, so here's what I did.


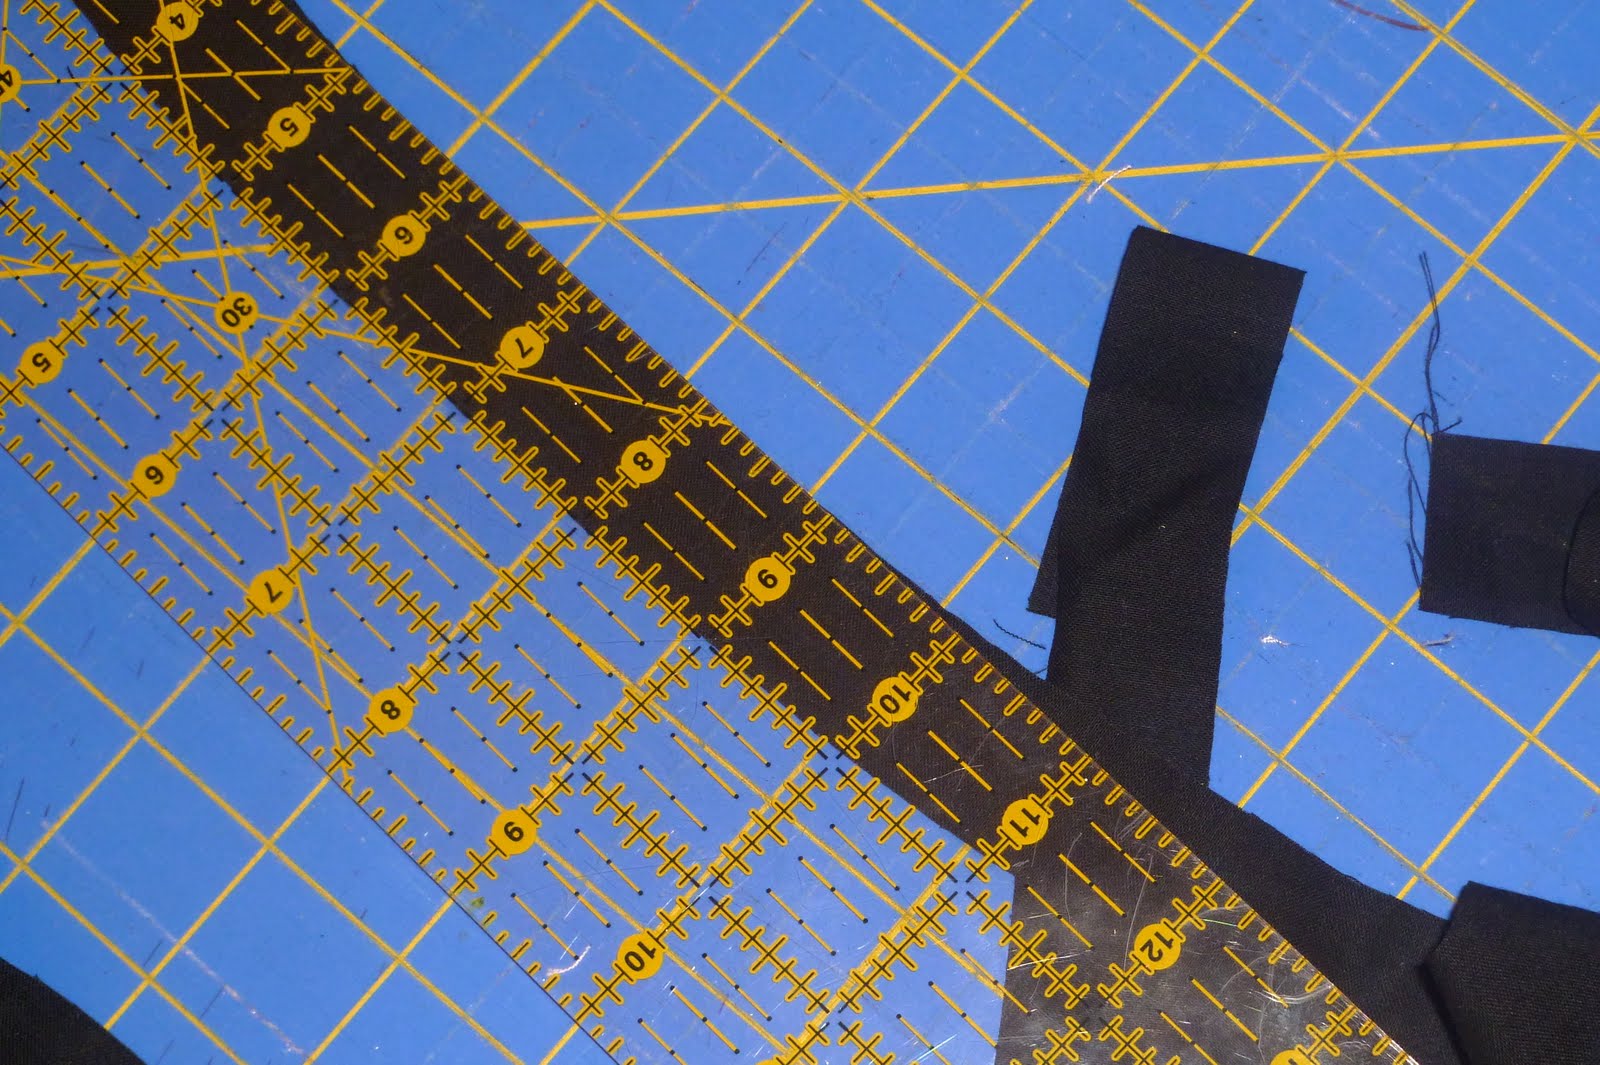
I cut a 1 inch strip of black fabric (above), then I ironed it in half, just like you would do for binding. (Shown below.)

Next, pin the black to the letter, raw edges out.


After you've sewn both sides, press them, and they should fold over nicely, leaving you with no raw edges on the outside.


Sew the black onto the top of the letter.  Make sure that you leave about 1/2" on either side, so that you can fold it back and create a nice finished edge on the end. (see below)


Then fold both over and pin in place.  Go ahead and press it, and that will help keep them where they're supposed to go.  Pins will keep them where they should be until you sew the letter down onto the other fabric.


The next part was trickier.  I sewed on the small pieces of black onto the legs of the A.  Then I had to fold them back, out of the way.  In the picture above, you can see that when I was sewing on the center black, I folded the end, so that there would be no raw edges.


Once all three sections are sewn on, you can press them and then pin them into submission.   The pressing helps out, but whatever is not in the exact place as it should be, will be taken care of when you sew it onto the other fabric.  So pin away and then you'll sew it down later.


For the last pieces on the bottom, go ahead and do the same as you did on the top, making sure to leave extra black hanging off the end so that you can then fold them under and pin.


And here's the finished A.  No, I did not do this for the small opening of the A.  I really wanted to and tried for a while, but decided to just applique a small triangle there instead.  It made life a lot easier.  


I am going to sew this down onto a pillow.  I will sew along in the ditch, where the pink and black meet.

I hope this helps you create a special little something for the ones you love. . . at least the ones who's name starts with an easy straight edged letter like A or T.