I have joined Lyanna of
Purple Panda Quilts and have made a stocking for one of the foster children she works with.
Please go to her
website and join her f
lickr group to make a stocking too. She's got great
tutorials on simple stockings. And really, to make one, it takes no longer than an hour or so.
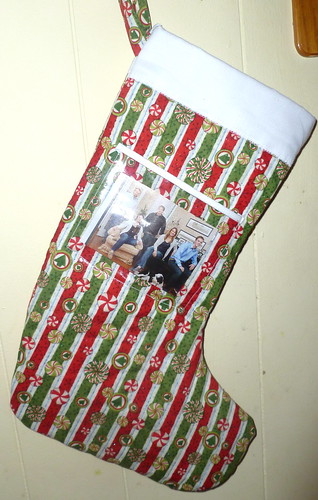
I have a little tutorial on how to add a picture pocket to the stocking that I'm going to share with you today.
Start with a piece of clear plastic bought from the remnant bin at your local quilt shop.
You can make yours whatever size you want. A picture is usually 3.5 x 5 inches or 4 x 6, but many pictures can be cut down to a smaller size.
Then take a piece of white (or whatever color you want) and make sure it is about 1/2 an inch longer than the top of your plastic piece. The width of the white should be one inch.
You will fold the one inch piece of white in half, like the picture shows, then iron. This will give you a good crease.
Use the crease that you just made as a guide. You will fold both sides of the crease into itself. See the picture below for an idea of what I mean. Line up the edge of the white to the center crease on both sides. Then press with an iron.
Once your piece of fabric looks like the picture above, fold it in half again. So now it is folded on the original crease that you made. And both sides of the fabric are folded so that they look like binding.
Next, place the plastic piece in between the white fold. This will be the top of the picture pocket.
This is what it should look like so far.
Next, place it where you want it. Pin it, and on the end of the white strip, where you have raw edges, just fold them over and pin under. You will not be able to see the raw edges if you do it this way.
Sew from the right end of the white strip, down to the bottom, turn your fabric. Go along the bottom, turn again, then go up to the left end of the white strip and back stitch to secure. DO NOT sew along the white strip again. That does not get sewn onto the stocking.
And that's it! Then continue with sewing your two sides of the stocking together. Make sure you do not try to add the pocket after the stocking is sewn together...you'll be miserable ripping seams!
I'm so glad Lyanna is putting in so much time and effort into making this Christmas special for the children in foster care that she works with. And thank you for helping!