Monday, January 16, 2012

So, Sewing is not all Sarah does

I like to make my kids' birthday cakes really special.

We start talking about them weeks before their birthday. They get so excited about their special cake.

Here are the cakes I made for my two older boys this year.

Rylan turned 7 in November, and he is all about Tron Legacy. It's a total boy movie.


I made it using cupcakes and just laid them out in the shape I wanted, then added a few more details. The pictures aren't the best, but it was great in person, just what he wanted.

Nathan turned 5 in December. He is all about pirates. Pirates of the Caribbean or Jake and the Neverland Pirates, it doesn't matter. He's there with his pirate hat on.


So I made him this pirate ship cake. It was actually fairly easy. He LOVED it!

How do you make birthdays special?

Sunday, January 15, 2012

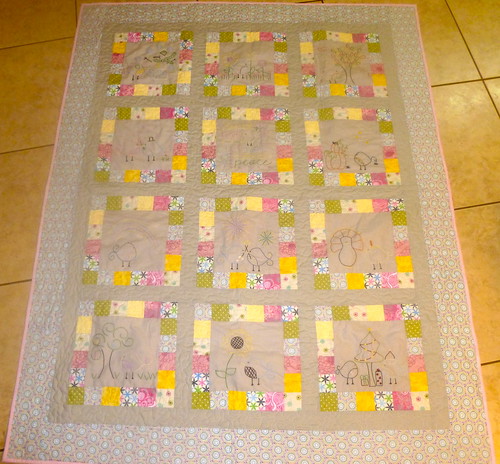
Birdie Stitches Quilt Finished!

I finished my niece Hannah's quilt just before Christmas.

Finished Quilt for Hannah

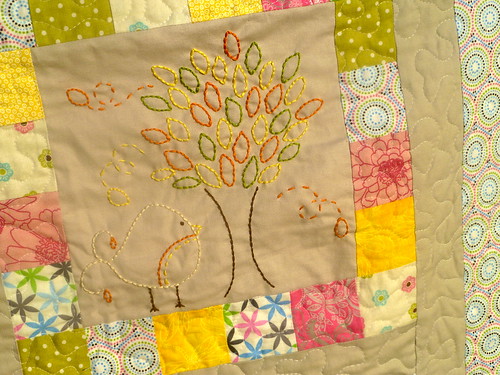
I joined in with Little Miss Shabby's Birdie Stitches.

August

It was a nice relaxing quilt to make throughout the year.  I enjoyed it and when I gave it to my niece, her mother cried.  She loved it.

September

Hannah loved it, too.  She pointed at each little picture and babbled about it.  It was really cute.

Saturday, January 14, 2012

Merry Christmas and Happy New Year!

I am sooooo late!  Hope you all had a wonderful holiday season.

I know I did.  We had so much fun as a family.  It flew by, though!


The quilts were a great hit with my nieces (really my sister and sister-in-law, since the girls are so young still.)


We really were blessed to be together with family and friends.


After that, we hit the ground running.  I've been in four states so far this year!  And my husband is still working his way back home on Monday.  Can't wait for him to get here. 


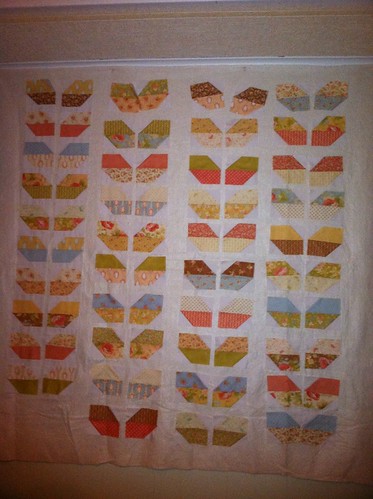
So, with a new year, a new quilt has been started.

Next! Finally able to work on a new project.

It's something that I saw from Fig Tree Quilts a long time ago. 


I used two charm packs of Buttercup from them as well.  It's all pieced now, except for one last 4 inch piece of white for the bottom.  I can't believe I ran out!


I'll be stopping by the store tomorrow for more of that so I can get it basted before my hubby gets home.  The backing is all ready, so is the binding.  I'll be trying some new free motion quilting on it.  I can't wait to show you!

Wednesday, December 21, 2011

Doggy Stitches is Complete!

Well, hello there!

I've been gone for a while, but have very busy!

I finished the Doggy Quilt for my niece Jael. I used the Birdie Stitches design from Little Miss Shabby but substituted a cute little hot dog, since my sister has two of them and my niece loves them.

So here it is completed. Keep in mind, the quilting looks MUCH better in person than it does in this picture. I did straight line stitch in the ditch. I need to get better at it, but really, it does look better in person.
Doggy Stitches Quilt

This is a close up of the last few blocks.
September Doggy BlockOctober Doggy StitchesNovember Doggy StitchesDecember Doggy StitchesJuly Doggy Stitches

The back is cozy flannel.
Back of Doggy Stitches

I think my sis will love it and I know my niece will. It was fun to make this throughout the year and then see it come all together in the end.

I also finished my birdie stitch quilt for my other niece and will be taking pictures tomorrow when the sun is out.

Hope you are getting everything finished up for Christmas! I believe I may start a few dish towels for my mother-in-law's stocking stuffer. Man, I'm cutting it close!

Thursday, December 8, 2011

New Christmas Craft

Things are going great on the sign up over on Flickr for the new Quilting for Kids quilt that we will be making.

We still need 11 black and white blocks and 9 grey and white blocks. They're super easy, you can follow this tutorial here, and have them done in under 20 minutes.

Thank you to those who have signed up and please feel free to spread the word.

On another note, I've made a new Christmas decoration this year. My inspiration came from this post at Every Creative Endeavor, and she got her inspiration from Pottery Barn! So...here's my rendition.

New this Christmas

I painted the sides red, then on the red O, I painted the sides white.


New this Christmas!

What do you think?

It was super easy. Paint, then hot glue, then staple gun and you're done!

Saturday, December 3, 2011

New Quilting for Kids Project

It's time to start a new project.

This time, we are making a quilt for a young man who is in the foster care system (he is the brother of the two sisters we made the pink and purple quilt for.)

This young man lives with a lot of stress, mostly situational.  But he also is working on acquiring coping skills that will help him handle things better when they don't go his way.

I've been at breakfast with my mom when she's received numerous frantic calls from him.  She has to help talk him down and help him relax and see the bigger picture.

That's the problem, the bigger picture sometimes looks so bleak, it's like you're looking out a very dirty window and if you could just wipe it all clean, things would look so much better.

This is where he is in life.  So we will make a quilt for him to comfort him and remember to keep looking, and things will clear up.

Dead Simple Quilt

So here's the plan.  When I saw this quilt by Toni (who helped us on the last Quilting for Kids quilts), I knew that this would be a great design for a boy.  It's a great, easy pattern that will be very striking in his favorite color combination, which is red, black, grey and white.

We are going to use solids only.  Because he is a teenage boy, I think it will be difficult to find many fabrics in these colors that are "boyish," I would hate to receive blocks that I don't feel would match the rest of the quilt and not be able to use them.

Also, I will be making the red blocks, so that the red will all match.  So what I need from you is a white/black or white/any shade of grey block. I know this seems like a much more boring quilt than the last, but I promise there will be another one shortly that will be for another girl and will allow us to be more creative with our fabric.

Each block will be 10.5" unfinished.
You will only need two 8.5" squares to get started.  One white and one either black or grey.  **Please use Kona white or something equivalent so that the blocks will look good next to each other.**  Any shade of grey is fine.

A full tutorial is available with pictures here, but basically you cut a 8.5" square from both fabrics and sew them right sides together all the way around the outside then cut into quarters along the diagonal.  Press then trim to 5.5" then sew back together in order.  It's super easy and fast.  I finished mine in 10 minutes.

I need 25 black and 25 grey blocks to make a twin size quilt.  If you would like to participate, go on over to the flickr group and sign up.    I would like to receive these blocks by mid January, so if you could mail them out by the 12th, that would be awesome. 

Thank you all so much for your help! And if you'd like to share on your blog or other media site and recruit people, by all means do!  You can also use the Quilting for Kids button for your blog.  It's available on the side bar...over there.----->

Linked up to

Sew Happy Geek

Tutorial for next project

I first made this block when I joined in on the Summer Sampler Series. 

This time, we're going to use it for the next Quilting for Kids quilt.

Start with a 8.5" square of Kona white (or other high quality white) and either black or grey - whichever you signed up for.

Pin them together, right sides together, if they have a right side. 


Next, sew all around the outside of the square.  When you get to the corner, just lift up your presser foot and turn.


Then, cut them in quarters, from corner to corner.  Voila, 4 HST's.


Press the HST open with the seam toward the color, away from the white.  Trim to 5.5".

Then sew them back together again.  Please press all other seams open.  This will help when I'm piecing.

And there you have it.  It's that easy!